

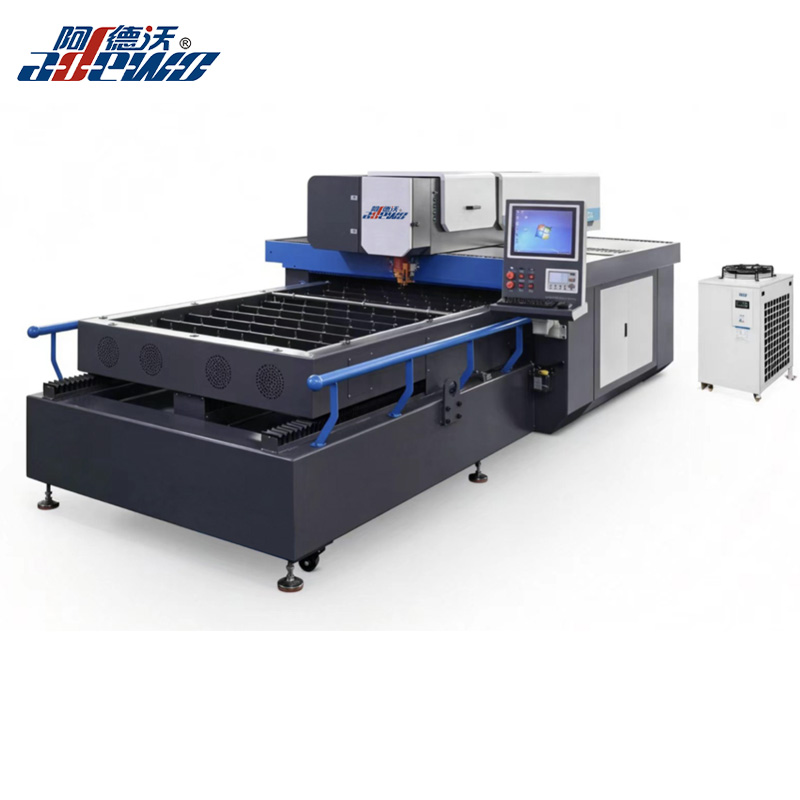
Professional Plywood Die Board Laser Cutting Machine: The Ultimate Tool for Precision Die Making
2026-09-18
Every die maker knows the frustration of a board that's just slightly off. With plywood die boards, precision isn't a luxury—it's the whole game. That's why the professional plywood die board laser cutting machine from ADEWO is turning heads: it delivers the accuracy and repeatability that manual methods can't match. Read on to see how this ultimate tool is redefining precision die making.
Why Plywood Resin Turns Into a Cutting Problem (And How to Avoid It)
The glue lines in plywood are not just thin layers of adhesive; they are dense, abrasive strips that punish any cutting edge passing through them. As a blade or router bit crosses each resin bond, it encounters a material far harder and more heat-retentive than the surrounding wood veneer. That difference creates uneven wear, steadily rounding over the cutting edge and forcing the tool to tear rather than slice. The result is a board edge covered in fuzzy fibers, burn marks from friction, and a blade that needs sharpening far sooner than expected.
Avoiding this starts with the right tooth geometry and feed discipline. A high-count alternating top bevel (ATB) blade with carbide tips handles resinous plywood far better than a ripping blade, because each tooth slices at a shallow angle instead of chiseling through the glue. For CNC routers, a compression spiral bit pulls downward on both faces, keeping the veneer from lifting and reducing the chipping that resin amplifies. Keep the feed rate steady and the RPM moderate; pausing in a cut lets heat build up exactly where the resin is melting onto the tool.
Even with the right setup, resin will eventually coat the cutting edges and change their shape. A quick soak in a citrus-based cleaner or a dedicated resin remover loosens the buildup without damaging carbide. Make it a habit to inspect the tooth backs after every few sheets, especially if you smell scorched wood or see small dark streaks on the cut edge. For long runs, a PTFE-coated blade or bit is worth the extra cost because the slick surface prevents resin from grabbing hold in the first place.
The Focus Lens Mistake That Leaves Rough Die Board Edges
Most die board shops chase speed and power settings when edges turn out rough, but the focus lens itself is often the quiet culprit. If the beam isn't converging at the right point relative to the material surface, the kerf widens and the cut loses its crisp entry angle. A lens that's even a millimeter out of position forces the laser to chew through the board instead of slicing it, leaving a burred, melted edge that's easy to mistake for a power problem.
Another overlooked issue is pairing the wrong focal length lens with the job. A lens designed for thinner stock will have a very short depth of focus, so on thicker die board the beam diverges before it exits the bottom. That means the top edge looks clean but the underside is ragged. Checking the actual focal point—not just the lens marking—and matching it to the board thickness removes most of that bottom-edge roughness without touching speed or gas pressure.
Lens condition matters just as much as position. A focus lens with a fine film of resin or spatter scatters the beam before it reaches the focal point, reducing energy density exactly where the cut needs to be sharpest. This produces the same rough edge as an out-of-focus setup, but it's often blamed on material quality. Cleaning the lens on a fixed schedule and inspecting it under a bright light takes less time than re-cutting a warped or burred die board.
Air Assist Tweaks That Stop Char Before It Starts
Most charring on wood or acrylic comes from heat buildup that never gets cleared away. A quick fix is to angle the air nozzle slightly toward the cutting front, not straight down. This pushes molten material out of the kerf before it can re-solidify on the edges. Paired with a modest pressure bump — just enough to hear a steady hiss — you will see cleaner cuts without blowing small parts around.
Different materials respond better to different airflow patterns. On thin plywood, a focused jet close to the lens keeps the surface cool and prevents the brown glue line from darkening. For thicker stock, move the nozzle back a few millimeters and increase pressure gradually, watching the backside of the cut. If sparks or smoke start curling upward instead of blowing away, stop and reduce the flow until the smoke trail hugs the table again.
Another overlooked trick is using short bursts of extra air at the start and end of each line. When the laser first pierces, heat spikes instantly and can scorch the entry point. A quick manual puff — or a timed solenoid valve if your controller supports it — clears that initial plume before it settles. At the end of a cut, keep the air on for half a second after the laser powers down to lift away any residual embers before they cool into black specks.
Keeping Warped Sheets Flat Without Extra Clamps
Warped sheets tend to pull away from glue lines or slide out of alignment just when you need them to stay put. A simple trick is to let the workpiece itself do the pressing. Lay the bowed panel on a dead-flat surface with the crown facing up, then place a few heavy boards or a toolbox across the high spots. Over the course of an hour or two, gravity works the bow down without any extra clamps in the way.
If you need the sheet flat right now, dampen the concave side lightly and set it crown-down on the bench. The moisture swells the fibers on that face and pulls the panel back toward flat. Keep a straightedge handy and check every fifteen minutes so you can flip the sheet or add a little weight before it overcorrects.
For thin plywood or acrylic that springs back, loop a ratchet strap around the whole stack and the bench top, then tighten gently. The strap distributes pressure across the full width and works like a pair of soft hands holding the sheet down. It takes up almost no space above the surface, so you can still mark, cut, or glue without reaching around a clamp body.
Nesting Layouts That Cut Waste, Not Just Plywood
Most cut lists treat nesting as a geometry puzzle—fit the parts, shrink the sheet. But a layout that only minimizes surface area can still bleed money through awkward offcuts, excessive blade changes, or parts that need rework because grain direction got ignored. The real goal is a cut plan that respects material, machine, and worker in one pass.
That often means grouping similar curves together, using common-cut lines between adjacent parts, and deliberately leaving a few larger, usable remnants instead of a pile of narrow strips. It also helps to place the most defect-sensitive pieces away from sheet edges and to sequence cuts so that small parts come out first, keeping the sheet stable. Small changes like these reduce cleanup time, handling, and mistakes—waste that never shows up in a simple material yield percentage.
The Maintenance Routine That Extends Laser Tube Life
Many operators overlook the simplest variable that keeps a CO2 laser tube alive: coolant temperature. Running distilled water at a steady 18–22°C, replacing it every few months, and bleeding air bubbles from the lines prevents thermal stress and internal corrosion. These small checks take minutes but stop the slow degradation that shortens tube life.
Power settings matter just as much. Continuously pushing a tube past 70% of its rated output forces the electrodes to work harder and accelerates gas depletion. When cutting thin materials, drop the power and increase speed instead—your tube stays cooler and the beam quality remains consistent.
Finally, clean the optics and check alignment weekly. Dust on mirrors or a misaligned beam path reflects energy back into the tube, causing hot spots that etch the bore and reduce output. A lint-free wipe and a quick alignment check are cheaper than replacing a tube a year early.
FAQ
It uses a focused CO2 laser with air assist to remove vaporized material quickly. The beam moves fast enough along curves that heat does not accumulate, and the air jet keeps the cut zone clear so edges stay crisp rather than charred.
Most models handle 15mm to 18mm birch plywood in a single pass, and some can go up to 25mm with slower feed rates. The key is matching the laser power, usually 150W to 300W for production shops.
Laser cutting leaves a narrower kerf, often around 0.3mm to 0.5mm, which means tighter slot tolerances for rule insertion. There is also no physical bit wear, so the first board and the hundredth board come out identical.
Yes, the beam can pierce holes as small as 1mm in diameter. With proper pulse settings, the surrounding plywood remains stable enough for repeated die strikes.
Daily cleaning of the lens and mirrors, checking the air filter, and wiping down the honeycomb bed prevent debris buildup. Weekly, you should check the belt tension and recalibrate the focus if the cut quality starts to drift.
Stacking is not recommended because the lower boards receive a defocused beam and the cut width becomes inconsistent. Better practice is to use a pallet changer or automated loading to keep the machine running continuously.
A proper exhaust system to remove smoke and particles, a fire-resistant enclosure, and a CO2 fire extinguisher nearby. Operators should never leave the machine running unattended because plywood can occasionally catch fire from resin pockets.
Most shops export a DXF file from their CAD software and use a common zero point. The laser controller follows that file exactly, and if the rule bender uses the same coordinate reference, the bends will match the cut slots within 0.1mm.
Conclusion
Getting clean, repeatable cuts from a plywood die board starts with understanding how the material behaves under a laser. Resin pockets and voids in the plywood can ignite or boil mid-cut, leaving charred slots that ruin registration. Running the machine with a properly matched focal length and keeping the lens free of residue prevents that rough, melted edge look many operators blame on power settings alone. Small adjustments to air assist pressure and nozzle direction make an equally noticeable difference—pushing smoke and debris away from the cut zone before it can condense on the surface. These aren't glamorous tweaks, but they separate a usable die board from scrap.
Flatness matters just as much. Instead of piling on extra clamps or weights, letting sheets acclimate near the cutting bed and using a vacuum hold-down system keeps warped boards stable without distorting the cut path. Thoughtful nesting also pays off: arranging die shapes to share cut lines and minimize offcuts reduces material cost while speeding up each job. That efficiency only holds if the laser tube itself stays healthy. A simple routine of checking mirrors, cleaning the exhaust path, and monitoring coolant levels extends tube life far more than occasional deep cleaning. In practice, the professionals who get the most from this machine treat it less like a one-button tool and more like a tuned instrument—every small habit compounds into cleaner cuts, tighter tolerances, and fewer rejected boards.
Contact Us
Contact Person: KAELYN LEE
Email: [email protected]
Tel/WhatsApp: +86 15012673758
Website: https://www.china-adewo.com