

China Top Hammer Drilling Supplier Providing Reliable Rock Drilling Solutions
2026-10-12
Rock doesn’t negotiate, and neither should your supplier choice. For crews tired of premature wear and inconsistent performance, PULANKA has become a go-to name among China’s top hammer drilling suppliers—delivering rock drilling solutions that are as dependable as they are hard-hitting. Here’s what you should know before placing your next order.
Where Top Hammer Drilling Outperforms DTH in Fractured Rock
In fractured ground, top hammer drilling often takes the lead because the percussion energy travels down the rod string from the surface, letting the bit hammer through broken, void-heavy formations without needing direct bottom-hole contact. DTH hammers sit right behind the bit and rely on stable pressure at the rock face; when cracks and voids interrupt that contact, the hammer loses rhythm and wastes air. Top hammer rigs also tend to be lighter and easier to reposition, so an operator can quickly adjust feed force when the bit suddenly drops into a cavity or slips through a loose seam.
Hole straightness provides another edge. Fractured rock has a habit of pushing bits off course, but a top hammer string with higher rotation speed and a stiffer rod setup corrects deviations more readily than a bulky DTH assembly, which can wedge in tight broken zones. Crews notice fewer stuck steel incidents and less downtime clearing blockages in heavily jointed formations, especially at depths under 30 meters where the extra air volume a DTH needs isn't worth the plumbing.
The advantage does have limits. Top hammer performs best in smaller diameters—roughly 64 to 102 mm—and shallower holes. Once you go deeper or larger in fractured rock, energy loss along the rod string evens the field, and DTH can regain ground. But for quarry and construction drilling in loose, broken ground, the simpler setup and quicker rod changes keep top hammer the more practical choice.
Matching Piston Impact Energy to Bit Diameter
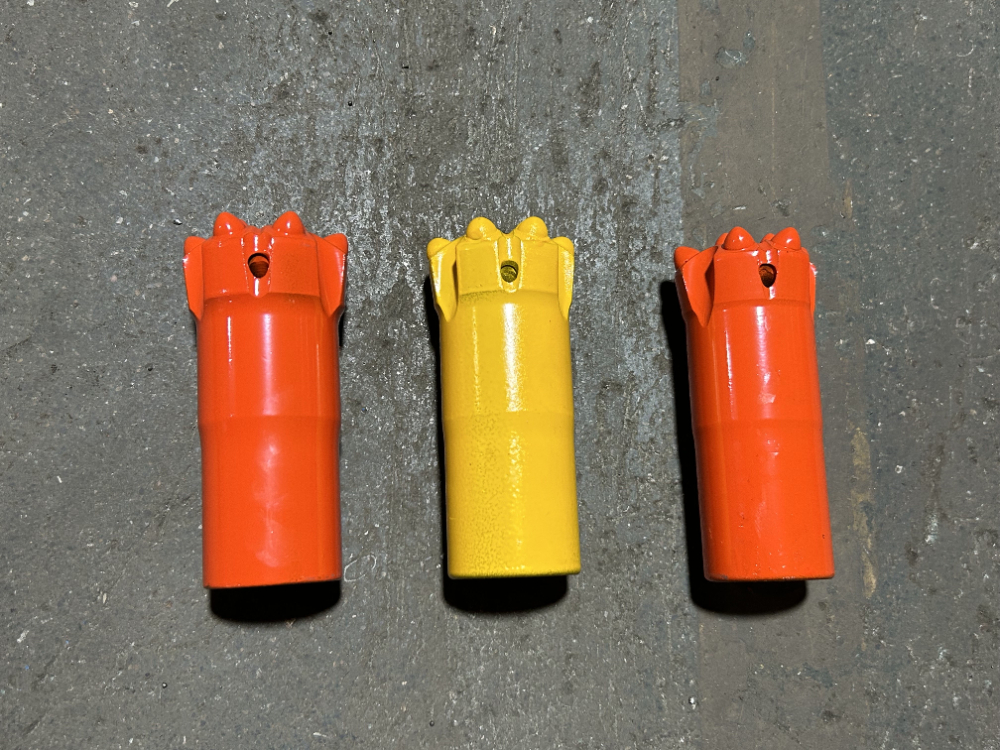
Getting the impact energy right for a given bit diameter is less about fixed rules and more about controlling stress at the rock face. A small-diameter bit concentrates each blow over a limited area, so too much piston energy simply crushes the cuttings into fines, overheats the insert tips, and can shatter the bit body. On a larger bit, the same energy spreads across a wider cross-section and often fails to initiate proper tensile cracks, leaving the hole bottom polished and the penetration rate crawling.
A useful starting point is to look at energy per unit bit area. Many field manuals suggest keeping impact energy in the range of roughly 0.8 to 1.5 joules per square millimetre of bit face for hard, brittle formations, and stepping down toward 0.4 to 0.7 J/mm² in softer or fractured ground. These aren't hard limits, but they bracket the zone where the piston's blow creates chips rather than dust or bounces. Matching the energy to the bit diameter also means watching the shank and bit connection—oversized energy for a small thread profile can induce fatigue cracks behind the shoulder.
Operationally, the best match shows up as steady rotation, clean chip evacuation, and a dull bit that wears evenly across the face. If the outer buttons round off while the centre remains sharp, the energy is usually too high for that diameter. If the centre buttons break and the gauge row stays intact, the bit is often being asked to drill with too little impact energy. Adjusting the piston stroke, accumulator pressure, or bit diameter should be done together until the drill sounds consistent and the cuttings look uniform.
Why Shank Adapter Failures Happen Sooner Than Expected
Shank adapters rarely die from a single obvious cause. Most often, they give out early because of a quiet combination of stress risers that get ignored during routine checks. A slight misalignment between the drifter and the drill string, a worn chuck bushing, or even a barely visible nick near the thread relief can concentrate bending loads exactly where the adapter is least able to handle them. Over a few hundred blows, that small imperfection turns into a fatigue crack, and from there it is only a matter of hours before the adapter snaps well short of its expected service life.
Thread damage is another early killer that gets blamed on the adapter when the real problem sits elsewhere. If the coupling threads are not fully engaged or the thread profile has been deformed by a previous strike, the impact energy no longer transfers cleanly through the faces. Instead, it hammers the thread flanks, causing galling, micro-welding, and eventually a brittle break. Operators who keep running a string with loose joints or who mix new adapters with heavily worn shanks will see failures that seem premature, but the adapter itself was never given a fair chance.
Heat and lubrication, or the lack of them, finish the job. Thread compounds wash out, grease points get skipped, and internal flushing pressure drops without anyone noticing. The resulting friction spike forces the adapter to absorb extra heat and torsional load at the same time, softening the steel just enough for the next impact to start a crack. Once that cycle begins, the adapter fails long before the hour count suggests it should, and the failure looks sudden only because the warning signs were subtle.
The Role of Rotation Pressure in Straight Holes
When a bit rotates inside a straight hole, the pressure generated at the cutting face does more than simply drive the tool forward. It stabilizes the bottom-hole assembly by counteracting lateral forces that tend to push the bit off course. Without a steady rotational pressure, slight variations in formation hardness or uneven wear on the cutters can quickly translate into a wandering trajectory.
In practice, drillers watch rotation pressure readings to judge how cleanly the hole is being maintained. A sudden drop often signals that the bit is no longer engaging the rock evenly, while a gradual climb can point to accumulating friction along the borehole wall. Adjusting weight on bit or rotary speed to bring that pressure back into a narrow band keeps the straight section straight longer, reducing the need for corrective runs.
How Chinese Suppliers Keep Inventories Ready for Emergency Reorders
Many Chinese manufacturers run what they call "sleeping inventory" for repeat buyers—finished goods or nearly finished subassemblies kept in a small off-line area of the workshop. Instead of producing only against confirmed orders, they set aside 5–15% of the previous order volume based on the buyer's sales pattern. This buffer gets refreshed after each production run, so when an urgent reorder comes in, the goods can be picked, repacked, and handed to a forwarder within 48 hours rather than waiting for raw materials.
On the supply side, long-standing relationships with local fabric, hardware, and packaging vendors allow factories to reserve raw material slots without paying upfront. A phone call can pull forward material that was scheduled for another client's later batch. Some suppliers also use shared warehousing clusters near ports, where multiple small exporters keep common components and colored packaging blanks. That setup cuts the reaction time sharply because the factory does not have to start from zero when a customer suddenly doubles the quantity.
When a Site Audit Reveals Hidden Wear in the Feed Beam
A routine site inspection often focuses on visible cracks or obvious structural shifts, but the feed beam can conceal a more insidious problem: microscopic wear that develops slowly under constant vibration and load. Technicians who only check for dramatic fractures may miss the fine pitting or surface fretting that weakens the beam over time, leading to sudden failure during peak operation.
Hidden wear in the feed beam typically starts at stress concentration points, such as bolt holes, weld seams, or the interface between the beam and its support brackets. Without disassembly or non-destructive testing, these early signs remain invisible, giving a false sense of security. A careful audit should include ultrasonic thickness measurements and magnetic particle inspection to reveal thinning or micro-cracks that would otherwise go unnoticed until a costly breakdown occurs.
What makes this type of degradation dangerous is its cumulative nature: each load cycle removes a tiny amount of material, and the damage accelerates once surface irregularities begin to act as stress raisers. By the time visual wear becomes apparent, the beam may already be operating beyond its safe fatigue limit. Site audits that rely solely on visual checks risk signing off on equipment that is quietly approaching the end of its service life.
FAQ
We pair high-grade alloy steel with heat treatment processes that are tuned for different rock hardness levels. Instead of offering one-size-fits-all bits, our team asks about ground conditions first, then recommends shanks, rods, and bits that actually match the job. That has cut downtime noticeably on granite and hard basalt sites.
Yes. We regularly package drifters, feed beams, control systems, and consumables into turnkey setups for quarries and underground mines. You give us your tunnel diameter or bench height, and we put together a rig layout that fits without forcing you to buy extras you don’t need.
We focus on sealing and thread design. Our rods and couplings use a tightened thread profile that keeps water and fine cuttings out, and we match flushing pressure to the ground. In fractured zones, we often supply bits with a deeper face profile so they stay centered and don't wander.
We can send an engineer to your site for the first drill test and operator training. If travel isn't practical, we do live video troubleshooting and provide torque, penetration rate, and rotation speed settings before the tools arrive, so you can start with the right parameters.
Standard consumables like button bits and rods usually ship within 10-15 days after drawing approval. For custom shanks or large-diameter DTH hammers, plan for 25-35 days. We keep semi-finished blanks for the most requested sizes, which helps shorten lead times during busy seasons.
They are, but the setup differs. For surface work we lean toward faster penetration and easy bit changes. Underground, we emphasize low vibration, compact length for narrow headings, and dust control. The same rig can often switch between tasks with just a rod and bit swap.
Every batch of steel goes through hardness testing on the thread zone and impact testing on the bit face. We keep a record of the heat number and machining line for each order, so if a tool runs short of expected life, we can trace the exact production window and adjust.
Conclusion
Top hammer drilling earns its keep in fractured rock where down-the-hole hammers often choke on loose debris and irregular voids. The key is transferring piston impact energy directly through the rod to the bit without crushing the rock structure, but that only works when impact energy is matched to bit diameter. Too much energy for a small bit accelerates shoulder wear and shank adapter fatigue; too little leaves the hole underpowered and crooked. Shank adapters fail sooner than expected not just because of poor steel, but because of micro-misalignment between the drifter and rod, incorrect thread torque, or heat checking from repeated high-frequency blows. A supplier that understands these failure modes will recommend the right thread compound, torque settings, and energy settings instead of simply shipping another adapter.
Rotation pressure is often treated as a background setting, yet it controls hole straightness more than many operators realize. Too low and the bit wanders off-line in broken ground; too high and the rod whips inside the bore, wearing the feed beam guides. That hidden wear shows up during site audits as uneven rail grooves, loose wear pads, or a slight tilt in the carriage. Chinese suppliers that keep emergency inventory for reorders add value only if they also send someone to inspect the feed beam and correct alignment. Otherwise, a fresh batch of rods and adapters will fail on the same hidden fault. A reliable partner combines ready stock with practical field audits, understanding that straight holes, longer component life, and fewer unplanned stops come from tuning the entire drilling system, not just swapping parts.
Contact Us
Contact Person: Elma
Email: [email protected]
Tel/WhatsApp: +86 13738628777
Website: https://www.pulankagroup.com/